- Before turning off the power, dispose of the waste ink in the waste ink tank, and perform cleaning and [Custody Wash] for storage.
1. If the "Check Waste Ink Tank" error appears, please follow the steps below to
replace it with a new waste ink tank.
(1) On the LOCAL mode screen, select [MENU] > [Maintenance], then press the [ENTER] key.
(2) Select [REPLACE WasteInkTank] and press the [ENTER] key.
(3) Pull the waste ink tank stopper forward.
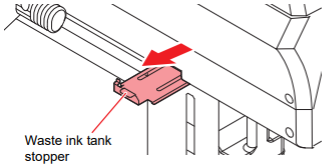
(4) Hold the waste ink tank handle and pull it toward the front to remove it.
* Attach the cap to the removed waste ink tank, and use tape to prevent leakage of waste ink.
* Request an industrial waste disposal company to dispose of waste ink.
(5) Install a new waste ink tank.
(6) Close waste ink tank stopper.
(7) Press the [ENTER] key.
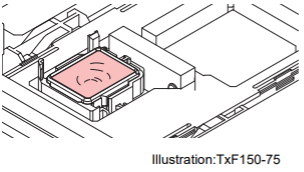
2. Please perform cleaning of the lower part of the carriage.
(1) On the LOCAL mode screen, select [MENU] > [Maintenance], then press the [ENTER] key.
(2) Select [STATION MAINT.] > [CARRIAGE OUT] > [HEAD MAINT.], and then press the [ENTER] key.
(3) Open the maintenance cover.
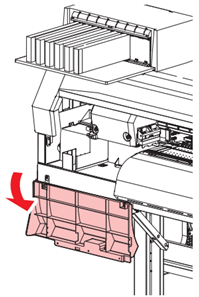
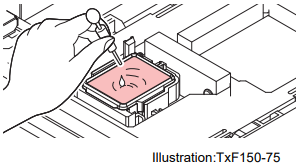
(4) Wipe off any ink adhering to the sides of the head and under the carriage.
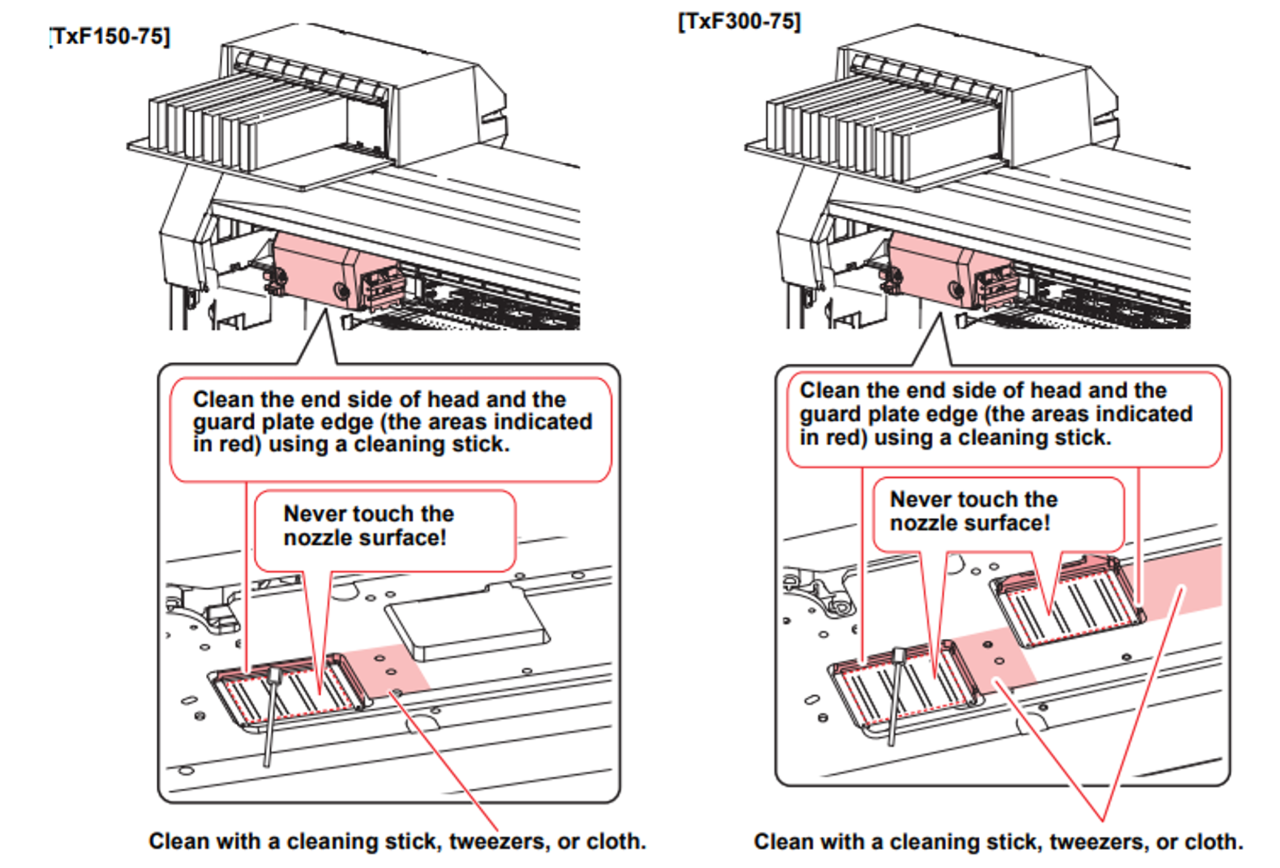
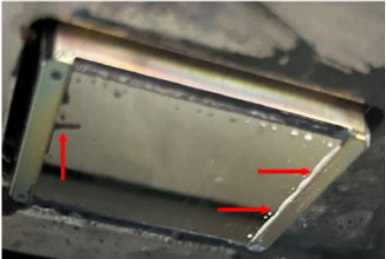
Wipe off the collected ink and other substances on the edges of the guard plate. (Arrow in red)
(5) Press the [ENTER] key.
3. Perform [TEST PRINT].
(1) With the screen in local mode, select [TEST PRINT/CLEANING] > [Test Print],
and then press the [ENTER] key.
(2) Select the "SCAN DIR." and press the [ENTER] key.
If there is nozzle missing during on the test print, perform [CLEANING]
[How to perform [CLEANING].]
(1) With the screen in local mode, select [TEST PRINT/CLEANING] > [CLEANING],
and then press the [ENTER] key.
(2) Select [NORMAL] and press the [ENTER] key.
4. Execute [Custody Wash].
(1) On the LOCAL mode screen, select [MENU] > [Maintenance], then press the [ENTER] key.
(2) Select [Station Maint.] > [Custody Wash], then press the [ENTER] key.
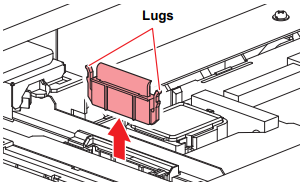
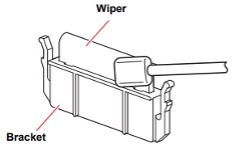
(3) Remove the wiper and clean the wiper and bracket.
- Pull out the wiper by holding the lugs at both ends.
- Wipe off any adhering ink or dust using a cleaning stick or tweezers moistened with maintenance liquid.
Wipe off the maintenance liquid. Make sure none remains.
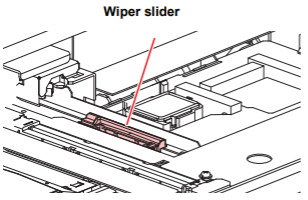
(4) Clean the wiper slider.
(5) Return the wiper to its original position, then press the [ENTER] key.
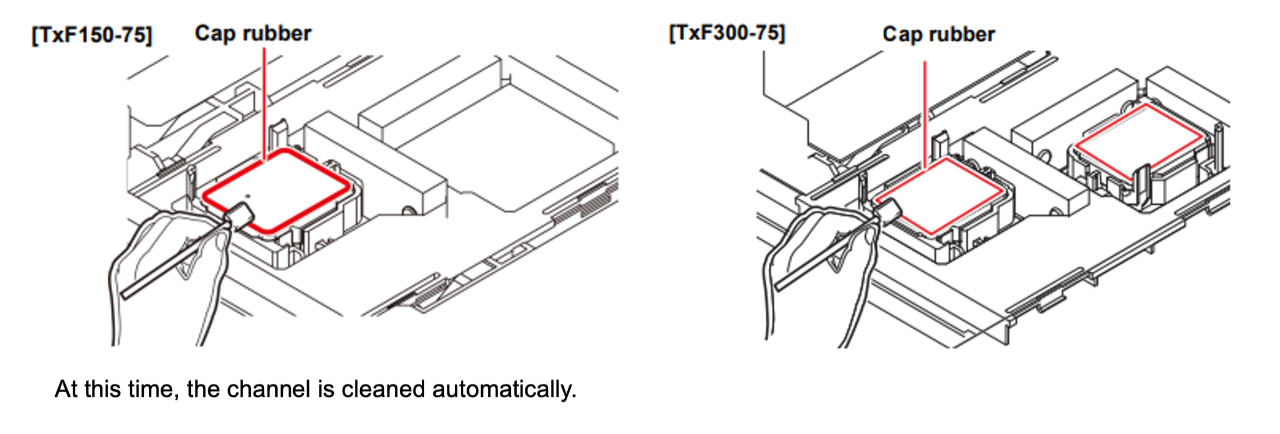
(6) Clean the cap rubber, then press the [ENTER] key.
- Wipe off any adhering ink or dust using a cleaning stick or tweezers moistened with maintenance liquid.
Wipe off the maintenance liquid. Make sure none remains.
- When using tweezers, be careful not to damage the wiper with them.
- If ink dry matter adheres to the cap rubber, it may cause cleaning failure.
(7) Press the [ENTER] key.
- The carriage moves over the platen and the cap is filled with maintenance liquid.
- Check whether the cap is filled with maintenance liquid.
- Pressing the [FUNC2] key enables additional filling with maintenance liquid.
(8) Set the leaving time, and then press the [ENTER] key.
- The recommended setting value is 5 minutes.
Setting value: 1–99 (in 1-minute increments)
- The nozzles are washed. The machine draws maintenance liquid from the cap.
- When the nozzle wash is completed, the cap is filled with maintenance fluid after the cleaning is
automatically executed.
- Check whether the cap is filled with maintenance liquid.
- Pressing the [FUNC2] key enables additional filling with maintenance liquid.
* If the maintenance liquid cartridge is usable, suck maintenance liquid into a dropper and fill up the cap with it.
(9) Press the [ENTER] key.
Pump tube (ink discharge channel below the cap) washing starts.
"Check Waste Ink Tank" message appears even after the maintenance,
follow the step 1. to replace with the waste ink tank.
[Notes]
* Do not leave the media on the platen unattended. It may cause the media to become uneven.
* When not in use, please raise the clamp lever and keep the pinch roller and grid roller separated.
Leaving the pinch roller lowered for an extended period can cause deformation of the pinch roller.
If the pinch roller deforms, there is a risk that the media may not feed correctly.
[Important]
Please check the following to prevent ink path clogging and to protect the nozzles.
(1) Please keep the main power switch on during long-term storage.
The nozzle clogging prevention function works automatically to protect the printhead nozzles.
Leaving the main power turned off for a long period of time may cause the nozzles to be clogged.
(2) Check the remaining amount of ink packs and maintenance cleaning liquid cartridges.
During the cleaning operation, suction of cleaning liquid and ink will take place.
During ink suction, nozzle wash does not start if "INK END" or "INK NEAR END" is detected.
During the idle period, regular maintenance consumes ink and maintenance cleaning liquid.
Therefore, it is recommended to set maintenance liquid cartridges and ink packs
(approximate weight 400g or more) with sufficient remaining quantities.
If the remaining amount is low, please replace the maintenance liquid cartridge and ink pack.
Please also refer to these videos for reference.